Create Your Virtual Avatar & Visit Mount Fuji in VIVERSE
Metaverse
4-minute read
A popular photo spot near Lake Kawaguchi in Japan, known for its stunning view of Mount Fuji, recently made headlines—and not for the right reason. A Lawson convenience store in the area, which offered an unobstructed view of the mountain, had to be closed due to a massive influx of tourists disturbing residents. Mount Fuji is definitely worth seeing, but causing inconvenience to others is a regrettable outcome.
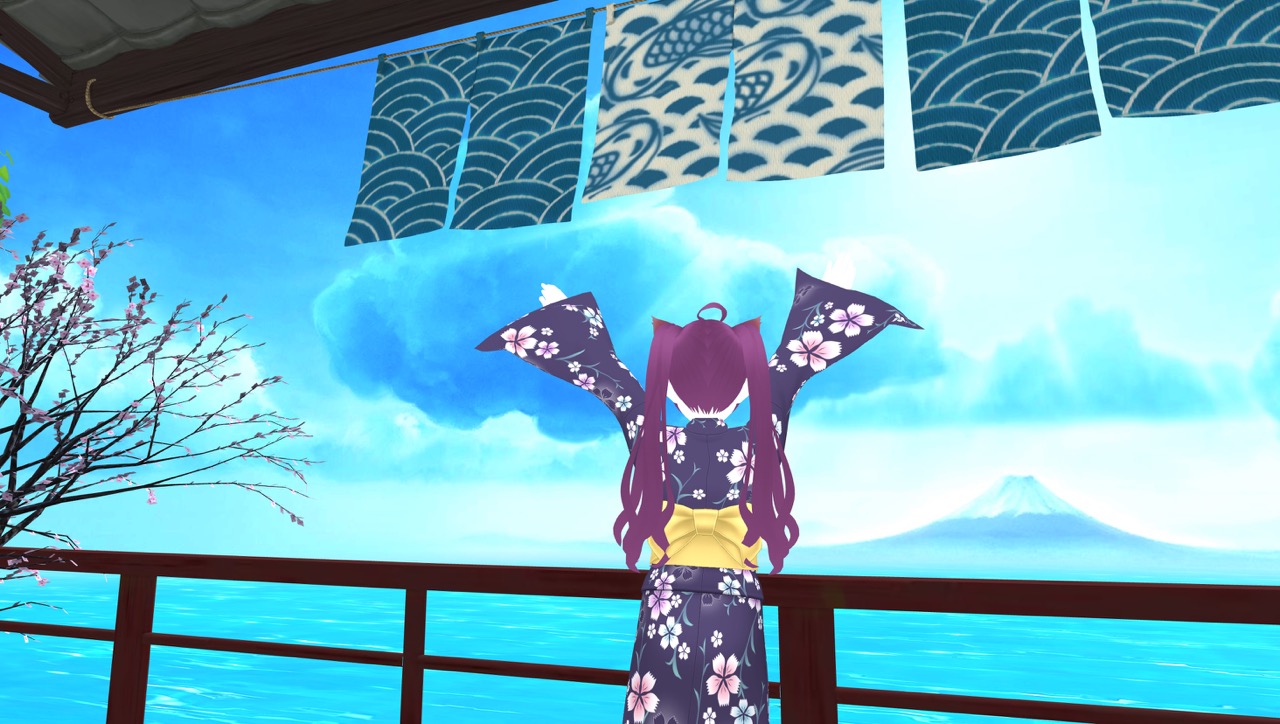
Alternatively, VIVERSE recently introduced the all-new Japanese Tatami World. It captures the essence of traditional Japanese aesthetics, and most importantly, the private balcony offers an expansive ocean view with the picturesque virtual Mount Fuji.
 Isn't it beautiful?
In this article, we'll show you how to claim a free VIVERSE World and share a few interior decoration tips. Read on if you want to appreciate the majestic Mount Fuji in virtual reality (VR) anytime, anywhere.
Step 1: Claim Your Free World
World is your personal space in VIVERSE. You can display a wide variety of three-dimensional (3D) objects and digital collectibles, embed videos and music, and invite friends over for social events or visit other Worlds of the like-minded. Registered members are currently entitled to four free Worlds.
Today, let's redeem the newly launched Tatami Room. Go to [My World] on your profile, click [Create], and start building a new World. Fill in the details, including the room name, description, thumbnail, and privacy settings. It's okay if you can't think of a catchy name on the spot; feel free to modify the information anytime.
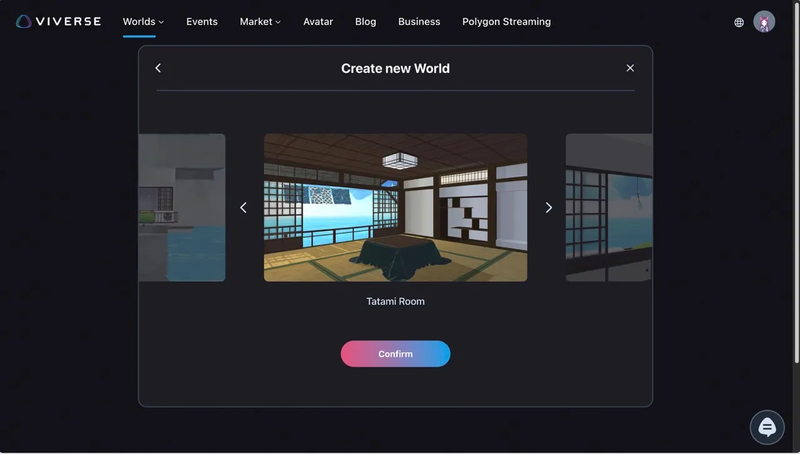 There are four different World templates to choose from; today, we're going with Tatami Room.
Tatami Room is quite bare when you first enter. It's decoration time, then! Click the pen-shaped icon [EDIT MODE] in the upper right corner.
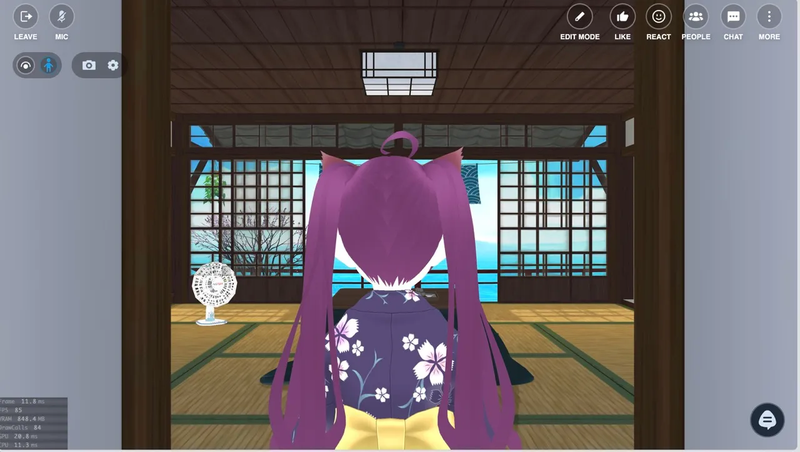 We can't leave the room empty, time to decorate!
Step 2: Add Sketchfab 3D Objects
If you're unfamiliar with creating 3D objects from scratch, Sketchfab is a convenient tool that offers free 3D objects. You can directly import them to your World, eliminating many of the hassles of downloading and uploading the models.
There are four icons at the bottom. Click the one on the left to open the Sketchfab search window. Please keep in mind that file size affects the loading time of your World.
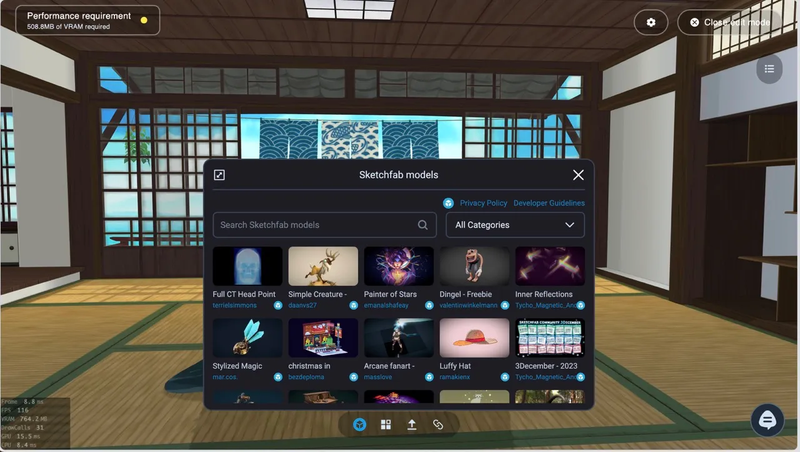
We used Sketchfab to find a Japanese snack set to place on the table, cat art for the alcove, cherry blossom trees for the balcony to elevate the gorgeous view, and Showa-era appliances to create a nostalgia look.
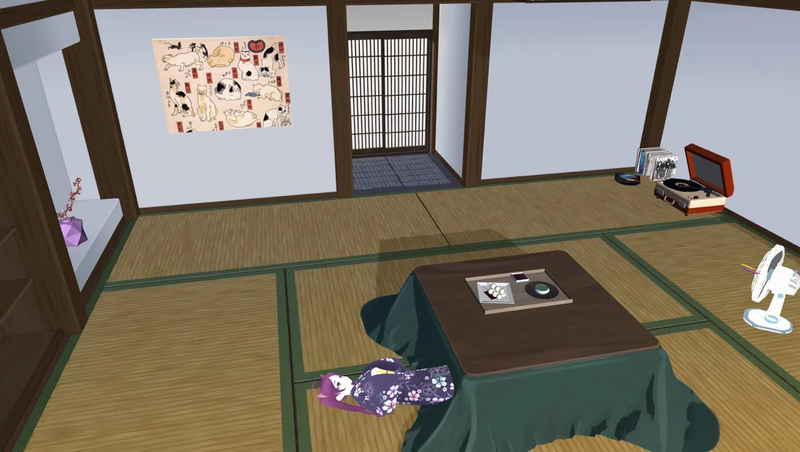 Here are the decorations using SketchFab-imported models.
However, there are tricks to placing these objects. You need to adjust the position, rotation, and size of 3D objects along the XYZ axes. This requires a little skill and patience. Check the position from multiple angles, just like you would when aligning the claw in a claw machine game. For example, when placing an object on top of another, like the snacks on the table in the image below, how do you position it properly? Begin by letting it sink slightly into the table surface, then slowly adjust the Z-axis to make it fit.
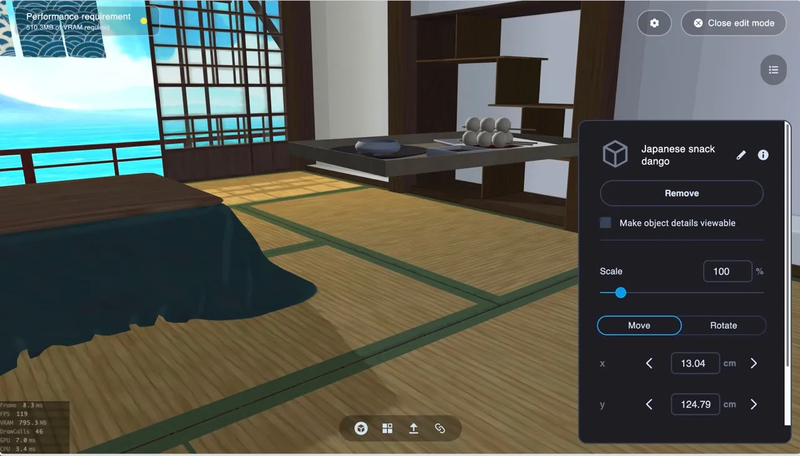 Adjust the position and angle using the control panel on the right.
Step 3: Add Images, Music, and Videos
You can also import your own files by selecting the second icon from the right [Upload] at the bottom. Currently, supported file formats include JPG, PNG, PDF, MP4, MP3, GLB, meaning you can add still images, 3D objects, music, videos, and even documents to your World.
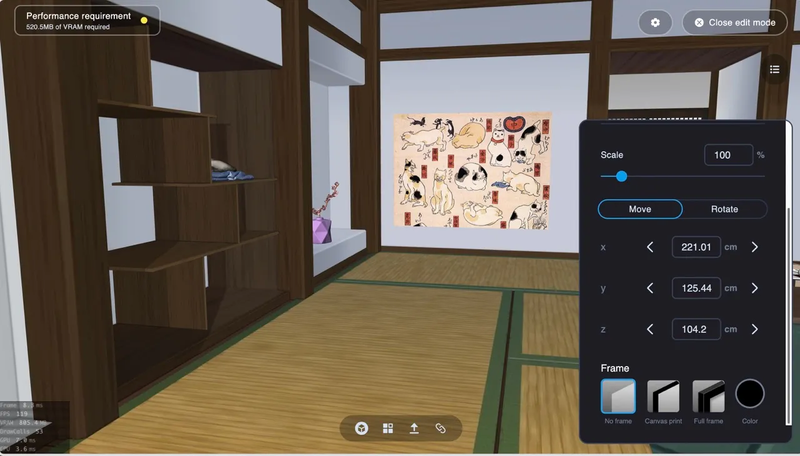 Hang the poster on the wall.
Images can be used as framed posters.
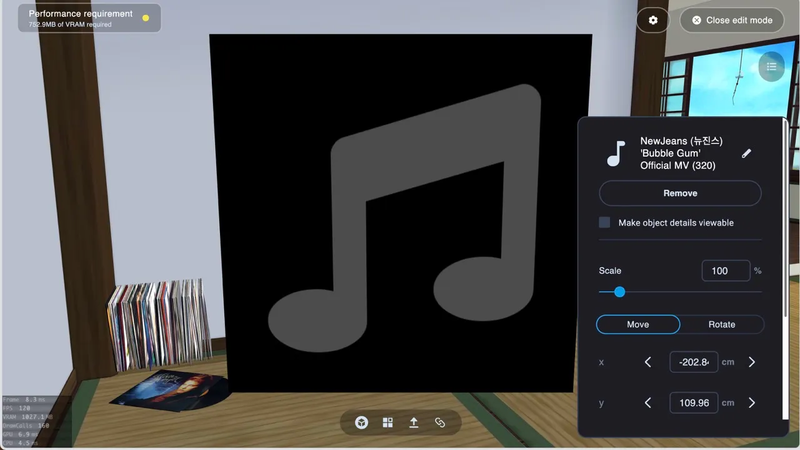
Put on some tunes to elevate the ambiance. Music will appear as a note block after it's uploaded. You can also choose to make it visible for visitors to click on.
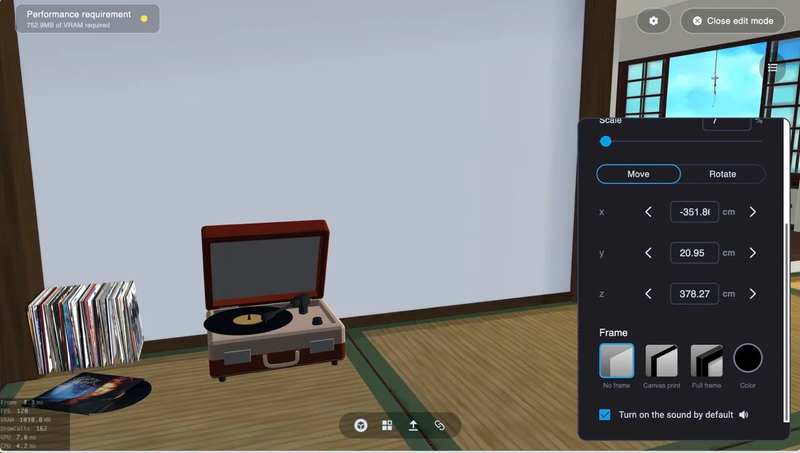 Hehe, the music seems to be playing from the record player.
We hid the music note block inside a record player and selected [Auto Play]. As soon as you enter, the background music automatically starts playing. It's worth mentioning that VIVERSE supports spatial audio (can be enabled in World settings), where the sound gets louder as you approach the source and vice versa. The audio experience is also directional, providing more realistic immersion.
Step 4: Import Files from URLs
This feature allows you to import web content directly through URLs, which we find very practical, especially for embedding YouTube content. We added a NewJeans MV to the screen of an old-fashioned television.
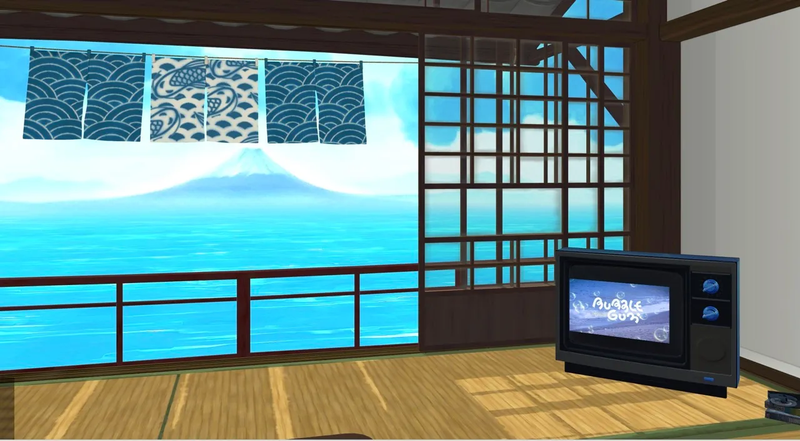 It's reminiscent of the vibe at grandma's house during summer vacations as a kid.
Step 5: Performance Management
After bringing all these large files into your World, glitches like lags and object disappearance could be an issue. The handy performance management features allow you to see file sizes easily. We recommend keeping the total file size of a World below 500MB.
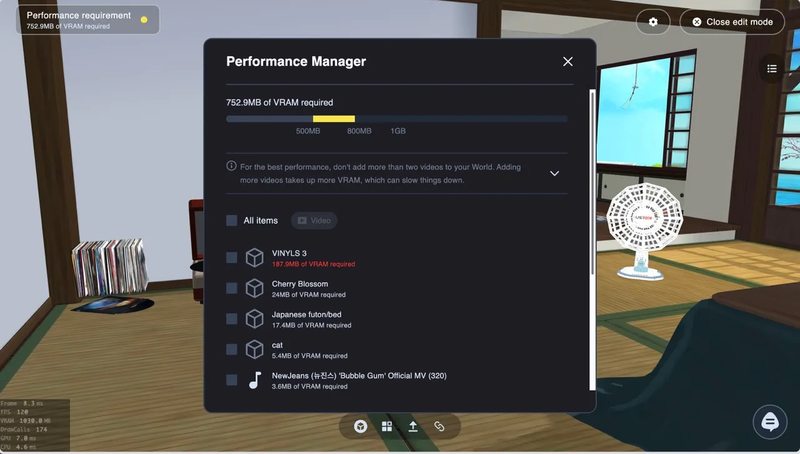 800MB is within the acceptable yellow light range, but it might be too much for mobile devices.
Step 6: Create a Free Virtual Avatar with VRoid
Once your World is set up, it's time to choose a suitable avatar. We used the free app VRoid to create a Japanese-style avatar, which has cute Yukata outfits in its default wardrobe.
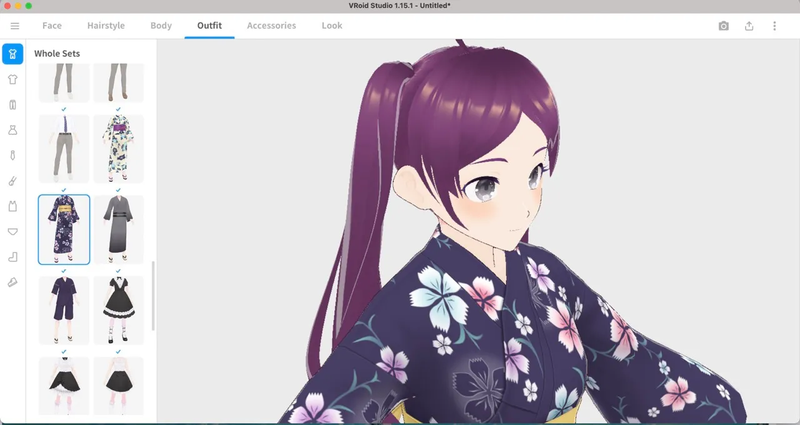 VRoid is a simple and easy-to-use free program. Highly recommend.
When you're done, save it as a VRM file to import to VIVERSE.
![]() VIVERSE supports built-in Avatars and VRM files.
VIVERSE supports built-in Avatars and VRM files.
Your space is decorated, and your avatar is all dressed up. Let's take some photos of Mount Fuji without other tourists ruining the picture.
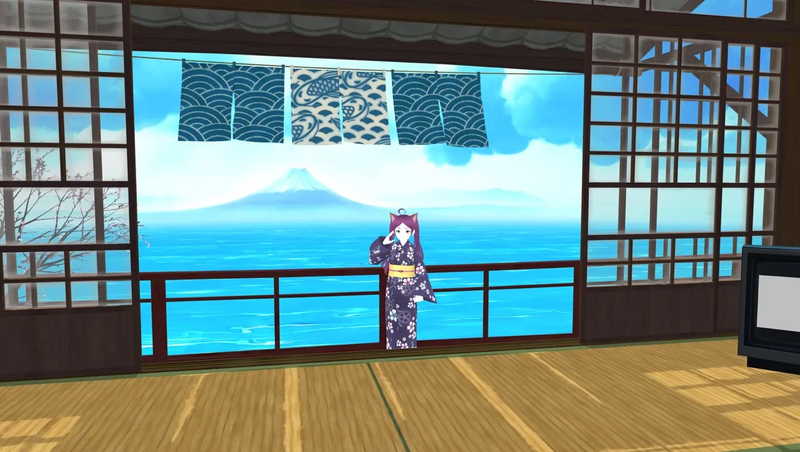
Setting up your VIVERSE World is super simple. Claim your free World now, and feel free to swing by ours World for a visit.

